Being in a new home, many things are needed to make it "liveable"; one of the more prominent ones being curtains for my bedroom. What's a crafty girl to do? Make them! I decided to get a "cheap," simple curtain rod from Walmart and use some nice fabrics from my large stash to make myself curtains. The process wasn't as straight forward as one would think though. First I had to pick out what colour I wanted my room to be, then find materials to match. I ended up going picking a medium green with an earthy brown accent wall and trim. With those colour chips close in hand I chose two fabrics in matching colours I really liked then got to designing. Since I really liked both colours and was aiming for just plain regular curtain panels, I ended up designing reversible curtains which could be switched depending on my mood or decor. I wasn't too sure how it would turn out seeing as how I'd only ever made curtains once before and that was well over a decade ago. Also they hadn't been anything impressive, but with so many recent triumphs in sewing, I just dived in and this time around I was very happy with the result, despite a couple mishaps and recuts of course.
 |
| My temporary sewing set up. |
With the fabrics chosen and the designs and measurements done I just needed the time and motivation to cut out and sew up the curtains. As I mentioned before, being in a new home means a lot of things need to be done and one of the less important needs was a table on which to actually do cutting and sewing. Fortunately I have a small light desk which is easy to relocate. So one a particularly perky day I took out my tools, set up shop and got to work on my curtains.
 |
| Gurr enjoying the fabrics. |
I made the loops first. In order to make the curtains TRULY reversible I made the loops half green and half brown. I was sure to make the loops thick enough to sew them inside out then turn them inside right so that none of the seams would show. I may or may not have used the end of a wooden spoon handle to push the fabric through itself.
 |
| Pieces to make the hanging loops. |
 |
| The hanging loops, some inside right, some inside out. |
 |
| Gurr being Gurr. |
 |
| More Gurr being Gurr. |
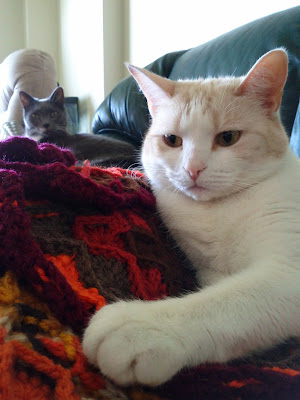
Gurr for some reason *always* enjoys a good roll on some fabric. I've yet to determine if this is simply because he enjoys getting in my way or if he loves the smell or the look of it. Either way, it never fails to be adorable yet hindering.
And again with the brown fabric....
I could sit here and post photos of his mischief all day, but I will spare you.... This time...
A couple mishaps: first I miscut the brown panels and had to sew on a 6 inch piece. I'm still unsure on if I mismeasured or just mismarked the fabric. It really is true: measure twice, cut once. Then a few times I sewed the panel backwards and had to undo all my work to start over. Again, I did the original sewing on the inside, then turned it inside right and resewed in order to hide the seams.
 |
| Final product. Side 1: Green side. |
 |
| Final product. Side 2: Brown. |
As I said at the beginning, I'm quite happy with how this project turned out. The curtains look and work great. My only issues are the miscut brown panels (at the top you see where I had to sew on an extension) and the left panel doesn't seem to ripple like the right one when it's open. The bottom of it just seems to flare. Overall, a great success though and I just might make some more for the living room and take orders for anyone who'd like some custom made curtains for their space.
I'm super glad to be getting crafty again. There's just something about creating things that is greatly rewarding. I have many projects in the works and will endeavour to post them up as I go. For now, I will sign off but encourage everyone to:
Keep Crafty!


