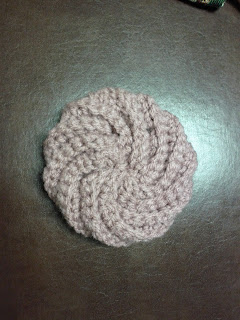
Since I've been spending so much time working on my big projects I chose to do a quick one this week for the Weekly Project. Here it is:
It was super quick to make. I used an F/5/3.75mm hook.
Ch 4. In 4th chain from hook, 3 trc, 3 dc, chain 1, 3 dc, 3 trc, chain 3, slip stitch, cut off leaving a long tail. You can either make a chain as long as you need or just leave it as one strand. I found leaving just one strand fits better in a book (closes better). Another neat idea would be to use different shapes for the base. A butterfly could be cute, or a kitty even. I did notice some cute 3D bases when browsing online.
I'm hoping to put up a post this week on the big projects I've been working on for the past week and a bit, but for now I'm posting pics of them on the facebook page found here.
Have a good week everyone, and Keep Crafty!
Showing posts with label Weekly Project. Show all posts
Monday, February 20, 2012
Sunday, February 12, 2012
Week 6: Journal Cozy
This was a neat project idea and I hope to make more of these. I didn't have any buttons to put but I will be adding them when as soon as I find some nice ones. Another addition I'd like to make is embellishments, such as a contrasting coloured flower.
I took the original pattern from here and tweaked it for a journal. I started with a base row of 26 chains. The pattern obviously needs to be modified to fit whatever journal you'd like to use. For the button holes I used doubles then skipped the 4th from the edge (sc, sk stitch then dc in next st).
I like that I can keep my pen with my journal now. I hope to make more of these for other various journals I have since I'm a total stationary nut.
Oh and let's not forget my company while hooking up this project:
Verdict: I liked this project and definitely look forward to making more. Especially some with contrasting coulours, various stitches and embellishments.
Well that's all for me tonight! Keep Crafty Everyone!
I took the original pattern from here and tweaked it for a journal. I started with a base row of 26 chains. The pattern obviously needs to be modified to fit whatever journal you'd like to use. For the button holes I used doubles then skipped the 4th from the edge (sc, sk stitch then dc in next st).
Oh and let's not forget my company while hooking up this project:
Verdict: I liked this project and definitely look forward to making more. Especially some with contrasting coulours, various stitches and embellishments.
Well that's all for me tonight! Keep Crafty Everyone!
Sunday, February 5, 2012
Week 4 and 5: Facial Cleansing Pads and Holder
This week is a double header! But don't get too excited, it's only because I missed last week's due to a fabulous 60s party.
Week 4: Facial Cleansing Pads
This is a pretty useful project, especially if you have oily skin, where lots of make up or just wash your face often. I had seen a few photos of these while browsing for dish cloth patterns several months ago and logged it away in my brain as a "someday it would be nice to make these", and well that some day finally arrived. I tried a few variations and experimented on a few different shapes until I settled on the most functional ones. Here are the results:
I used Bernat Cotton for all the Scrubbies/Cleansing Pads, the hook size varied per pattern. Photo captions are linked (except Simple Round, I wrote the pattern beneath it)
This one was pretty easy but proved to be the most useful/efficient
I used a J/10-6.00mm hook [for both the Simple Round Cloth (above) and the Little Flowers (below).]
Chain 4
12 dc in 4th chain from hook, sl st into first dc
ch 3, 2 dc in each dc of previous row, join with sl st
cut and weave in end
So far they work great and I'm lovin' them!
Week 5: Facial Cleansing Pad Holder
Now that you've made the Cleansing Pads you need somewhere to keep them. Well here you go:
I used Red Heart Acrylic pink yarn to match the scrubbies somewhat. Original pattern linked below, I used the pattern's recommended size hook.
I based this item on the pattern found here. After row 5 I just continued with the dc (basically repeated row 5 another 3 or 4 times). Once I got to the height I wanted I finished off with the same cotton yarn I used for the Cleansing Pads but in a shell pattern:
Join yarn to work, Chain 1, dc in 2nd st from hook, 4 dc in same st, * sk next st, sc in next st, sk next st 5 dc in next st repeat from * to end. Cut and weave in ends.
And all together now:
Like I said, I'm quite happy with the outcome of this project and use it daily :) I hope some of you find it just as useful and fun to make. It was a very quick project to make, took a couple hours in total and very well worth the effort.
So that's the project for the week, hope you all enjoy!
Keep Crafty Everyone!
Week 4: Facial Cleansing Pads
This is a pretty useful project, especially if you have oily skin, where lots of make up or just wash your face often. I had seen a few photos of these while browsing for dish cloth patterns several months ago and logged it away in my brain as a "someday it would be nice to make these", and well that some day finally arrived. I tried a few variations and experimented on a few different shapes until I settled on the most functional ones. Here are the results:
I used Bernat Cotton for all the Scrubbies/Cleansing Pads, the hook size varied per pattern. Photo captions are linked (except Simple Round, I wrote the pattern beneath it)
![]() |
| Puffy Flower Tawashi |
![]() |
| Simple Round Cloth |
I used a J/10-6.00mm hook [for both the Simple Round Cloth (above) and the Little Flowers (below).]
Chain 4
12 dc in 4th chain from hook, sl st into first dc
ch 3, 2 dc in each dc of previous row, join with sl st
cut and weave in end
![]() |
| Little Flower Cloth |
So far they work great and I'm lovin' them!
Week 5: Facial Cleansing Pad Holder
Now that you've made the Cleansing Pads you need somewhere to keep them. Well here you go:
I used Red Heart Acrylic pink yarn to match the scrubbies somewhat. Original pattern linked below, I used the pattern's recommended size hook.
I based this item on the pattern found here. After row 5 I just continued with the dc (basically repeated row 5 another 3 or 4 times). Once I got to the height I wanted I finished off with the same cotton yarn I used for the Cleansing Pads but in a shell pattern:
Join yarn to work, Chain 1, dc in 2nd st from hook, 4 dc in same st, * sk next st, sc in next st, sk next st 5 dc in next st repeat from * to end. Cut and weave in ends.
And all together now:
Like I said, I'm quite happy with the outcome of this project and use it daily :) I hope some of you find it just as useful and fun to make. It was a very quick project to make, took a couple hours in total and very well worth the effort.
So that's the project for the week, hope you all enjoy!
Keep Crafty Everyone!
Labels:
Bathroom,
Bin,
Facial Cleansing Pads,
Flower,
Scrubbies,
Set,
Spa,
Weekly Project
Sunday, January 22, 2012
Week 3: Tawashi!! (Eco Scrubbies)
Since I moved into my new place my list of "to buy" items has filled up pretty quick with cheese graters, dishcloths and everything in between. This week, while browsing for a project to work on I took a look at some dishcloths and scrubbies. Earlier in the week I noticed a friend on facebook mentioned making scrubbies so I looked some up and decided to give it a try myself, here is what I've come up with so far;
I looked up a few patterns and tried out 3 of them. There's a few variations I'd like to try at some point in the future, experimenting with different yarns and stitches, but the patterns seem quite promising.
My fav so far is the Spiral Tawashi. My next endeavour will be to combine the acrylic yarn and cotton yarn with the Spiral Tawashi pattern.
I'd love to go into more detail but that will have to wait until tomorrow or Tuesday as it is late and I gotta get up early for work. The patterns for both the Spiral and Regular Tawashi's are both found online, (click on the photo for the link) the Tawashi knot however was a purchase pattern that I improvised on. I will share the pattern once I've tweaked it a bit and write it out.
Have a good night everyone!
Tawashi (Eco-Scrubbies)
![]() |
| Spiral Scrubbie |
![]() |
| Tawashi Knot |
![]() |
| Tawashi |
I'd love to go into more detail but that will have to wait until tomorrow or Tuesday as it is late and I gotta get up early for work. The patterns for both the Spiral and Regular Tawashi's are both found online, (click on the photo for the link) the Tawashi knot however was a purchase pattern that I improvised on. I will share the pattern once I've tweaked it a bit and write it out.
Have a good night everyone!
Sunday, January 15, 2012
Week 2: Pretty Headbands
This week I worked on a much smaller project: simple headbands with small flowers. I'm hoping to get a little more creative with this idea in the future, provided something else doesn't snatch away my volatile attention. I'd like to make some with different flowers, different colours, lots of flowers, different band pattern, ect... For now, here is what I've got for a pattern.
This pattern is 100% HN&S, I browsed photos for ideas then just came up with this. Feel free to use it as a base then tweak it to make it your own. I'd love to hear of any projects made and evolved from this simple pattern. You can leave a comment here on the blog or message me privately at HookNeedleSpindle@gmail.com Enjoy!
Pattern:
Materials used:
5.00 mm crochet hook (size H/8)
1 skein pink
1 skein light green
1 skein dark green
* any scraps will do, this pattern doesn't require much yarn*
Headband:
Chain 105 bind off.
Count 32 from each end and mark the loop.
Start at chain 32, attach same colour yarn and do slipstich through next stitch (stitch 33). Crochet as follows: slip stitch (in chain 34), single crochet (in 35), single crochet (in 35), half double (in 36), half double (in 36), double crochet (in 37), double crochet (in 37), triple crochet ( in 38), continue to triple crochet in stitches until stitch 59, triple crochet (in 59), double crochet (in 60), double crochet (in 61), half double (in 62), half double (in 63), single crochet (in 64), single crochet (in 65), slip stitch (in 66), slip stitch (in 67), slip stitch and bind off in 68 (same stitch as second marked loop)
Flower:
Chain 5, join to form ring. In ring fit the following, *Sc, hlfdbl, dc(x3), hlfdbl, sc, repeat from * 3 more times, bind off. You now have a a four petaled flower. in a contrasting colour. Sew the flower to the headband and you're done!
This post is a rather quick one as I have to get up early for work tomorrow, but I hope to have a little more detail and some better pics up later in the week.
Thanks for checking in, hope all is well, and of course, Keep Crafty Everyone!
Saturday, January 7, 2012
Week 1: Half-Double Afghan
The first week of the new year has passed and it's now time to start the weekly project posts. Enjoy!
I started this project over the holidays and finished it within a couple weeks. I didn't use a pattern, just a half-double variation stitch and randomly switched between green and brown.
I started this afghan with the idea of it being part of a set. The set, when complete will consist of this afghan, a large full sized blanket and a pair of matching slippers. I started the slippers first but when I got a pair of awesome slippers from my dad for Christmas I moved on to the afghan and put the slippers on hold. But hopefully soon enough the matching slippers will be featured in a weekly project over the next few months.
Pattern:
Repeat rows 2 and 3 for
10 rows green (starting with row 1 of pattern)
5 rows brown
10 rows green
10 rows brown
12 rows green
2 rows brown
8 rows green
4 rows brown
2 rows green
3 rows brown
2 rows green
10 rows brown
7 rows green
4 rows brown
4 rows green
2 rows brown
3 rows green
7 rows brown
2 rows green
2 rows brown
12 rows green
4 rows brown
8 rows green
Keep Crafty everyone! See you next week!
Half-Double Afghan
![]() |
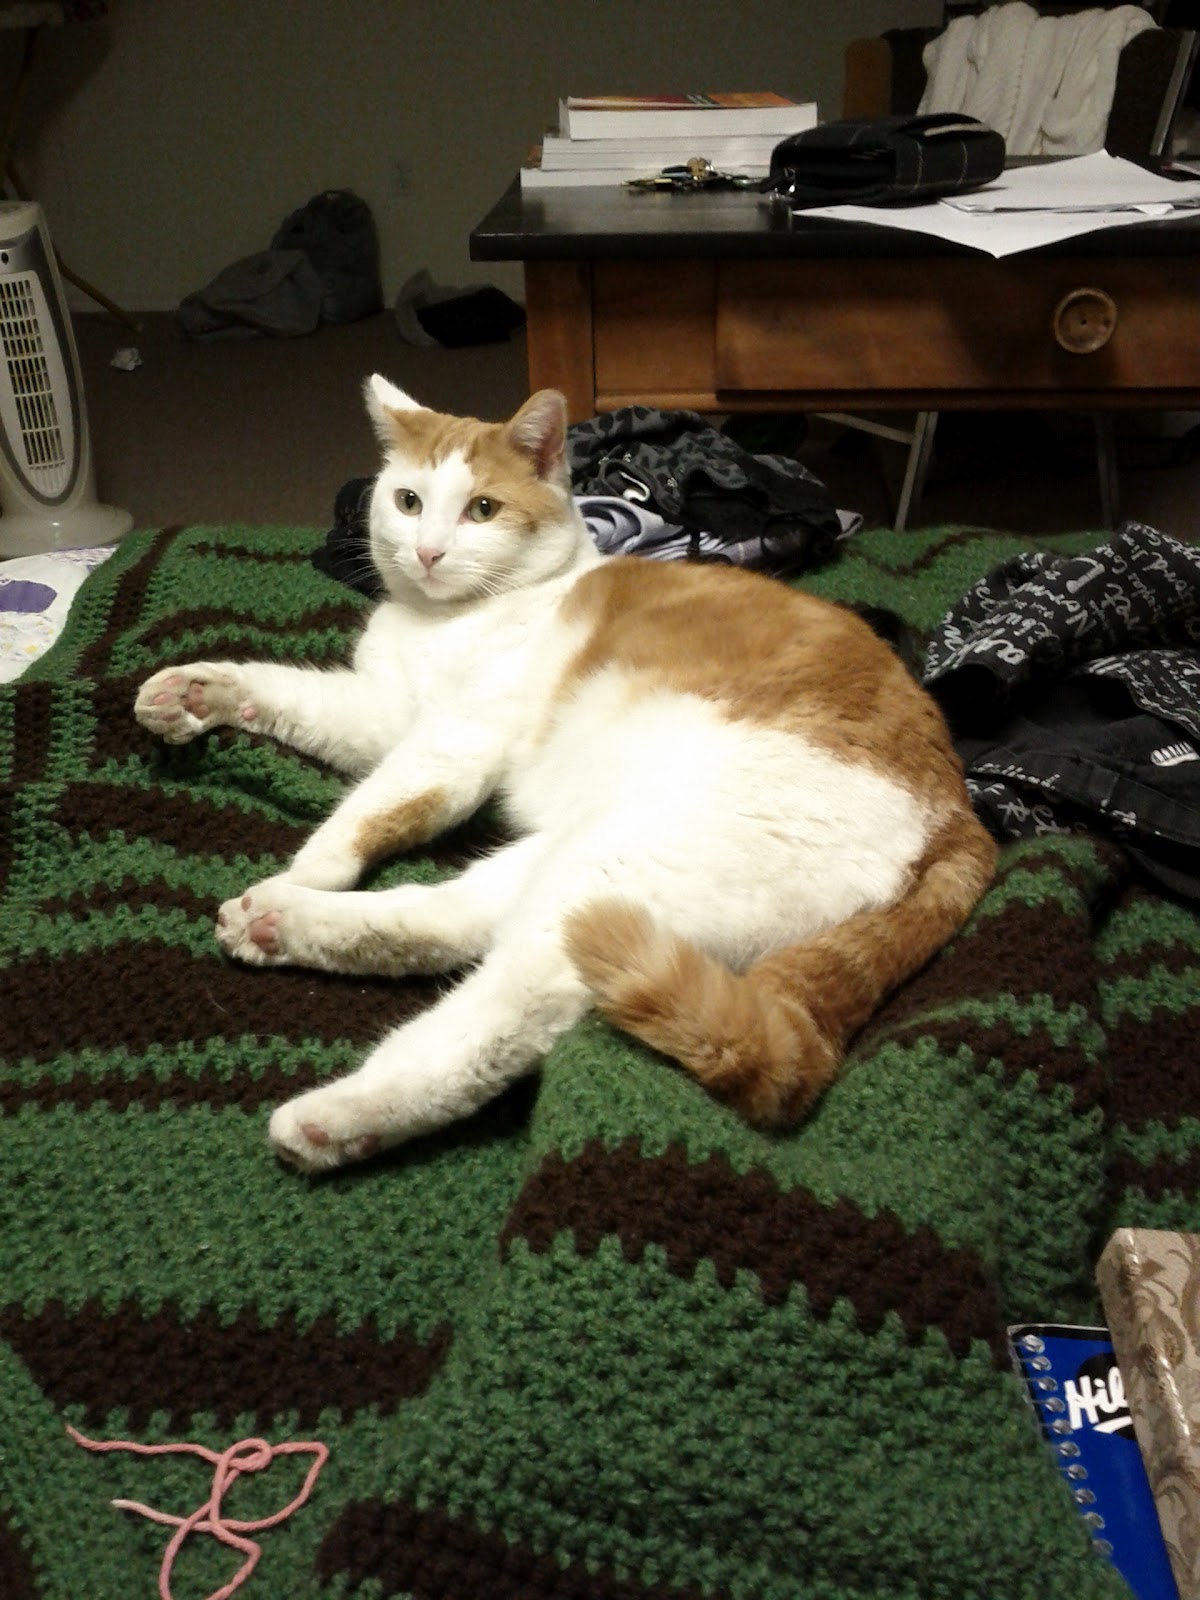
| Half double afghan and kitty |
![]() |
| Close up of the stitch and border |
I started this afghan with the idea of it being part of a set. The set, when complete will consist of this afghan, a large full sized blanket and a pair of matching slippers. I started the slippers first but when I got a pair of awesome slippers from my dad for Christmas I moved on to the afghan and put the slippers on hold. But hopefully soon enough the matching slippers will be featured in a weekly project over the next few months.
![]() |
| Afghans are always kitty approved, no matter the kitty |
Pattern:
Materials used:
- 6.00 mm crochet hook (size J/10)
- 3-4 skeins of "Medium Thyme" Red Heart Super Saver yarn (198g/7oz/333m)
- 3 skeins of "Coffee" Red Heart Super Saver yarn (198g/7oz/333m)
Main
I started with green and chained 82. Then crocheted half double stitches interspersed with single crochets.
Base: Chain 82
Row 1: *yarn over, insert hook in 3rd chain from hook, yarn over, pull yarn through chain, yarn over and pull through all loops on hook (3). [This completes a half double.] Chain 1, skip next stitch Repeat * until the last two stitches. Half double crochet in both stitches (with no chain 1 in between). Turn
Row 2: Chain 3, *half double crochet in next chain 1 space, chain 1. Repeat from * till last two stitches. Half double crochet in first double crochet of previous row. Turn
Row 3: Chain 2, *half double crochet in next chain 1 space, chain 1. Repeat from * till last chain 1 space and stitch. Half double crochet in last chain 1 space, half double crochet in last stitch (with no chain 1 in between)
Repeat rows 2 and 3 for
10 rows green (starting with row 1 of pattern)
5 rows brown
10 rows green
10 rows brown
12 rows green
2 rows brown
8 rows green
4 rows brown
2 rows green
3 rows brown
2 rows green
10 rows brown
7 rows green
4 rows brown
4 rows green
2 rows brown
3 rows green
7 rows brown
2 rows green
2 rows brown
12 rows green
4 rows brown
8 rows green
Border
With green join to anywhere on main afghan edge. Work half doubles all around afghan. On verticle edge, work stitches in row spaces, *1 half double in each 3 spaces then 2 half doubles in the 4th space, repeat from *till corner. 2 half doubles in corner space, chain 3, 2 half doubles in same space.
For horizontal edge I did half doubles in each stitch, however this seemed to be too many stitches as my horizontal border is quite 'wavy'. If I were to do it again, I would try a variation of 3 half doubles then 1 half double over 2 stitches.
For the half double border rows I did 2 green, 2 brown, 2 green then 1 final row of single crochet in green.
I'm not all that great at writing out patterns from memory, so you'll have to bear with me over this year as I learn to eloquently write out instructions on my creations. But on the off chance this project inspires anyone to get crafty I'd love to hear about and better yet see a photo of your creation. Leave a comment or leave me an email at Hookneedlespindle@gmail.com.
Keep Crafty everyone! See you next week!
Subscribe to:
Posts (Atom)